Groin Strain Exercises: A Comprehensive Rehabilitation Plan
Effective rehabilitation prioritizes active exercises over passive treatments, significantly improving return-to-sport rates without pain. This criterion-based protocol guides clinicians through a non-operative approach.
Understanding Groin Strains
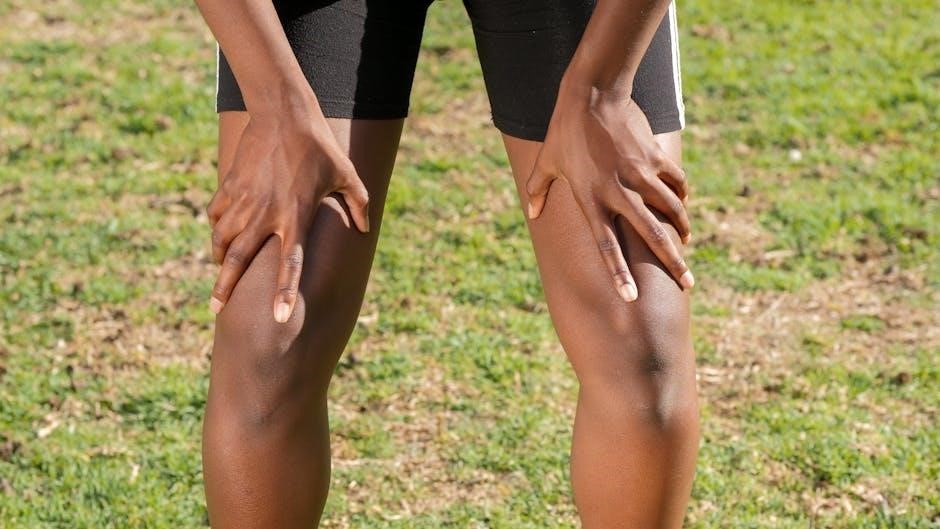
Groin strains, commonly termed adductor strains, involve damage to the muscles and tendons on the inner thigh. These injuries frequently occur in athletes participating in sports demanding quick changes in direction, sprinting, or kicking – think soccer, hockey, and football. The adductor muscles, responsible for bringing the legs towards the midline, are particularly vulnerable.
Understanding the mechanism is crucial; often, it’s an overstretch or forceful contraction during athletic activity. Pain location varies, potentially felt in the groin, inner thigh, or even extending towards the upper hamstring. Initial symptoms include sudden, sharp pain, often accompanied by swelling and tenderness.
Effective management hinges on accurate diagnosis and a phased rehabilitation program. Ignoring early signs or returning to activity prematurely can lead to chronic pain and re-injury. A comprehensive approach, as detailed in rehabilitation protocols, focuses on restoring strength, flexibility, and proper biomechanics.
What Causes Groin Strains?
Groin strains typically arise from sudden, forceful contractions or overstretching of the adductor muscles. A common culprit is inadequate warm-up before activity, leaving muscles unprepared for intense exertion. Poor flexibility and muscle imbalances – where adductors are weaker than opposing muscle groups – significantly increase risk.
Specific movements frequently implicated include rapid changes in direction, explosive sprinting, kicking, and lunging. These actions place considerable stress on the adductor muscles, exceeding their capacity and leading to micro-tears within the muscle fibers or tendons.
Pre-existing conditions, like previous groin injuries, can also predispose individuals to re-injury. Furthermore, inadequate conditioning, improper technique, and even fatigue can contribute to the development of a groin strain. Addressing these factors is vital in both prevention and rehabilitation.
Grading Groin Strains (Severity Levels)
Groin strains are categorized into three grades based on the extent of muscle fiber damage. Grade 1 strains involve mild discomfort, minimal loss of strength, and no noticeable swelling. Athletes can typically return to activity within 2-4 weeks with appropriate rehabilitation.
Grade 2 strains present with more significant pain, moderate weakness, and some swelling or bruising. These injuries require a longer recovery period, generally 5-8 weeks, and a more comprehensive rehabilitation program.
Grade 3 strains are the most severe, characterized by intense pain, substantial weakness, significant swelling, and potentially a palpable defect in the muscle. These often involve a complete muscle tear and necessitate a prolonged recovery, potentially exceeding 8 weeks, with careful, progressive rehabilitation; Accurate grading is crucial for tailoring treatment and predicting return-to-sport timelines.

Phase 1: Acute Phase (0-72 Hours)
Initial management focuses on RICE – rest, ice, compression, and elevation – alongside NSAIDs for pain. Gentle movement, as tolerated, is encouraged during this period.
RICE Protocol: Rest, Ice, Compression, Elevation
Rest is paramount in the initial 48 hours, minimizing aggravation of the injured adductor muscles. This doesn’t necessarily mean complete immobilization, but avoiding activities that cause pain. Ice application, for 15-20 minutes every 2-3 hours, helps reduce pain and inflammation. Always use a barrier between the ice pack and skin.
Compression, using an elastic bandage, aids in controlling swelling. Ensure the bandage isn’t too tight, hindering circulation. Monitor for numbness or increased pain. Elevation of the injured leg above heart level further assists in reducing swelling. This is most effective when combined with compression.
Consistent adherence to the RICE protocol during this acute phase is crucial for minimizing tissue damage and setting the stage for a successful rehabilitation process. It’s a foundational step towards recovery, preparing the groin for subsequent phases of treatment and exercise.
Pain Management Strategies (NSAIDs)
Non-steroidal anti-inflammatory drugs (NSAIDs) can be a valuable component of early groin strain management, helping to alleviate pain and reduce inflammation. Common over-the-counter options include ibuprofen and naproxen, but consulting with a healthcare professional is crucial before initiating any medication regimen.
NSAIDs work by inhibiting the production of prostaglandins, substances that contribute to pain and inflammation. While effective, they are not a long-term solution and should be used in conjunction with other rehabilitation strategies, like RICE and gentle exercises.
It’s important to adhere to recommended dosages and be aware of potential side effects, such as gastrointestinal upset. NSAIDs provide symptomatic relief, allowing for better participation in early rehabilitation exercises, but addressing the underlying muscle weakness and imbalances remains the primary goal.
Gentle Range of Motion Exercises
Early, pain-free range of motion (ROM) exercises are vital to prevent stiffness and maintain some joint mobility following a groin strain. These should be initiated as soon as tolerable, avoiding any movements that significantly increase pain. Focus on controlled, small movements rather than pushing through discomfort.
Examples include gentle hip flexion, abduction, and adduction within a pain-free arc. Simple pendulum movements of the leg can also be beneficial. The goal isn’t to regain full ROM immediately, but to prevent secondary complications like muscle contractures and joint adhesions.
These exercises should be performed slowly and deliberately, paying close attention to the body’s response. Avoid bouncing or forcing the movement. As pain subsides, the range can be gradually increased, always respecting the limits of tolerance. Consistent, gentle movement promotes healing and prepares the groin for more advanced rehabilitation.

Phase 2: Early Rehabilitation (Days 3-14)
Focus shifts to isometric adductor work, initial stretching, and low-impact cardio like cycling or walking, progressing as pain allows, based on individual tolerance.

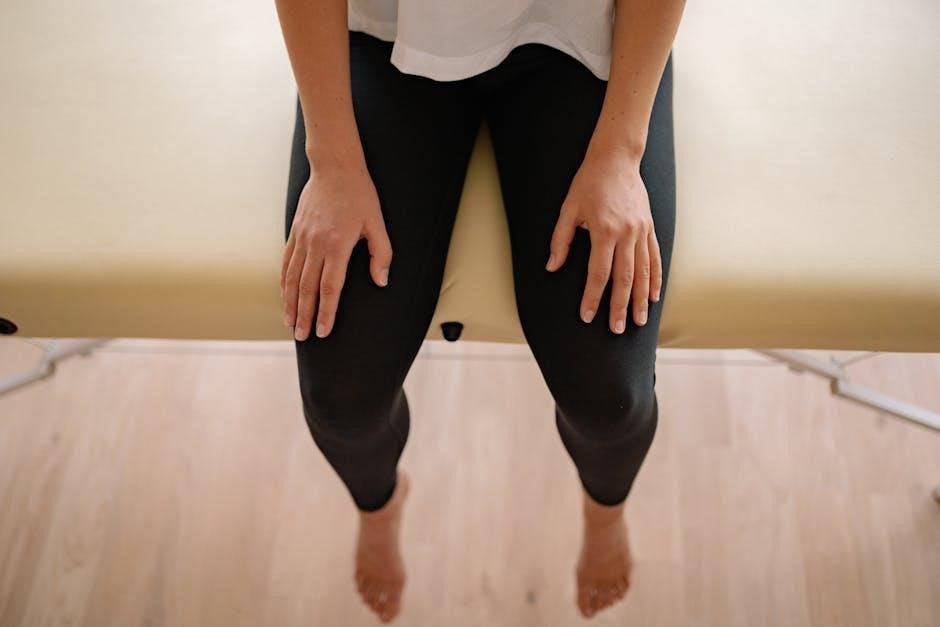
Isometric Adductor Exercises
Isometric exercises are crucial during the early rehabilitation phase (Days 3-14) as they allow for muscle activation without joint movement, minimizing stress on the healing groin strain. These exercises build a foundation of strength while protecting the injured tissues. Begin with gentle contractions, focusing on squeezing the adductor muscles – those on the inner thigh – together.
A simple starting point is performing adductor squeezes while lying on your back with knees bent and feet flat on the floor. Imagine you are trying to hold a ball between your knees, maintaining the contraction for 5-10 seconds, then relaxing. Repeat this 10-15 times. Another variation involves pressing your thighs against a pillow or rolled towel placed between your knees.
Progression involves increasing the hold time and the number of repetitions. It’s vital to perform these exercises pain-free. Any increase in pain signals the need to reduce intensity. The goal is to gradually re-establish neuromuscular control and begin the strengthening process without exacerbating the injury. Consistent, controlled contractions are key to successful early-stage rehabilitation.
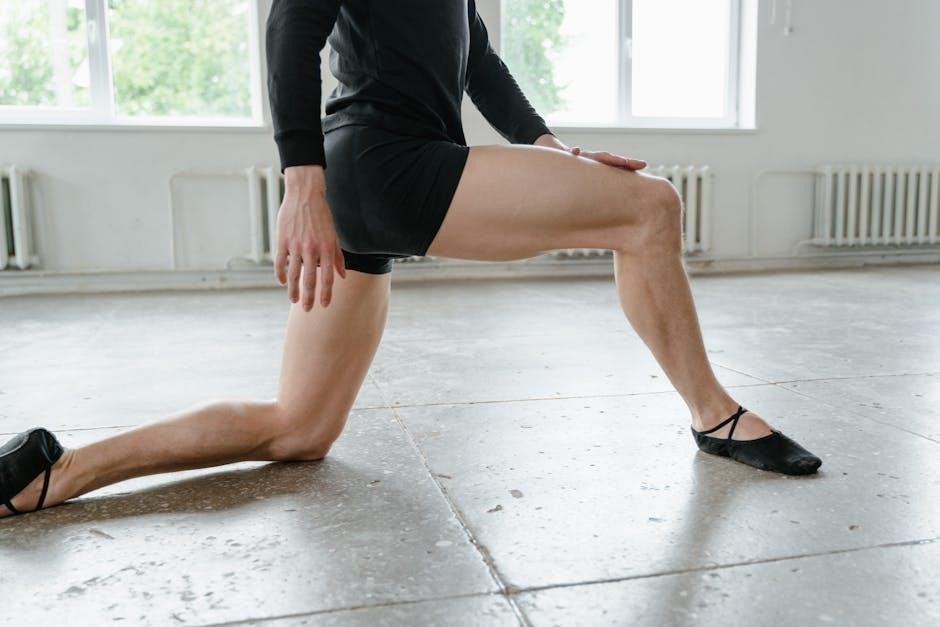
Hip Adductor Stretches (Initial)
Gentle hip adductor stretches are introduced early (Days 3-14) to restore flexibility and range of motion, crucial for preventing future re-injury. However, these must be performed cautiously, avoiding any sharp or increasing pain. The initial focus is on passive stretches, meaning you’re not actively contracting the muscles during the stretch.
A foundational stretch is the supine (lying on your back) hip adductor stretch. Lie flat with bent knees and feet on the floor. Gently allow your knees to fall open to the sides, feeling a stretch along the inner thighs. You can use gravity to deepen the stretch, but only to a comfortable level. Hold for 20-30 seconds, repeating 2-3 times.
Important considerations include maintaining a relaxed posture and avoiding bouncing. Focus on a slow, controlled stretch. As tolerance improves, a slight overpressure can be applied, but always within pain-free limits. These initial stretches prepare the muscles for more dynamic movements in later phases of rehabilitation, promoting optimal healing and function.
Low-Impact Cardio (Cycling, Walking)
Introducing low-impact cardiovascular exercise during the early rehabilitation phase (Days 3-14) is vital for maintaining overall fitness without exacerbating the groin strain. Activities like cycling and walking promote blood flow to the injured area, aiding in tissue healing and reducing stiffness. However, intensity and duration must be carefully monitored.
Begin with short durations – 10-15 minutes – at a low intensity. Cycling on a stationary bike with minimal resistance is an excellent starting point, as it allows for controlled movement. Walking should be pain-free and performed on a flat surface. Gradually increase the duration and intensity as tolerated, always prioritizing pain management.
Crucially, avoid any activities that cause groin pain or discomfort. Monitor for any signs of increased soreness or swelling. These exercises are not intended to strengthen the adductors directly, but rather to maintain cardiovascular health and prepare the body for more demanding exercises in subsequent phases.

Phase 3: Strengthening Phase (Weeks 2-6)
Focus shifts to rebuilding strength with eccentric adductor exercises, side-lying leg raises, and Copenhagen plank variations, progressively challenging the groin muscles.
Eccentric Adductor Strengthening Exercises
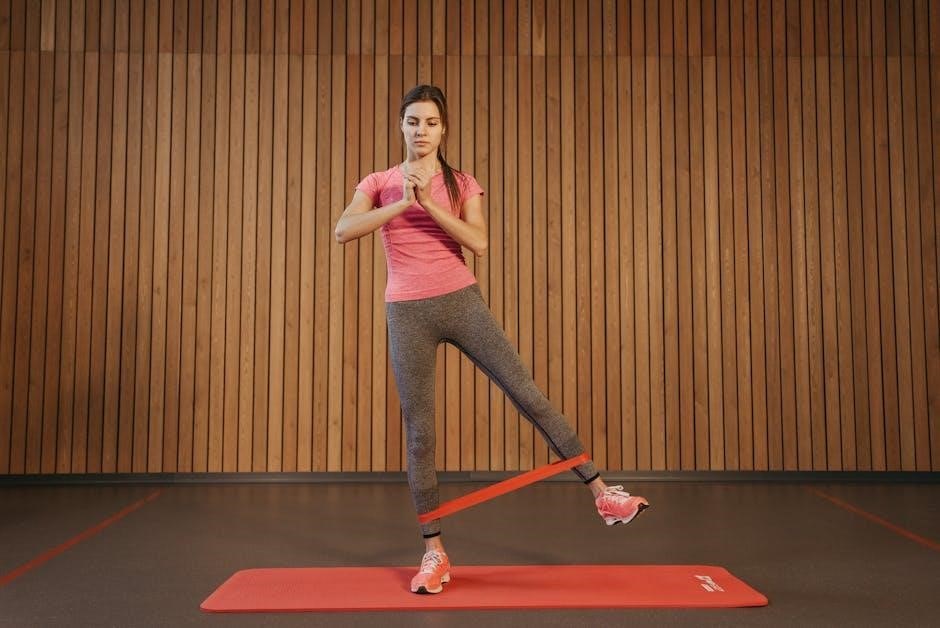
Eccentric strengthening is crucial for preventing re-injury, as identified by Tyler et al, who developed a program specifically targeting this aspect of rehabilitation. These exercises involve lengthening the adductor muscles while contracting, building strength and resilience. A common example is the resisted adduction with a band, focusing on a slow, controlled return to the starting position.
Begin with lighter resistance and higher repetitions, gradually increasing the band tension or resistance as strength improves. Proper form is paramount; maintain a stable core and avoid compensatory movements. Another effective exercise involves a slow, controlled lowering phase during hip adduction.
Progression should be guided by pain levels and functional improvements. Monitor for any increase in symptoms and adjust the intensity accordingly. The goal is to build strength throughout the full range of motion, preparing the adductors for the demands of athletic activity. Remember, this phase is about controlled loading and rebuilding functional capacity.

Side-Lying Leg Raises
Side-lying leg raises are a foundational exercise in groin rehabilitation, effectively targeting the adductor muscles while minimizing stress on the injured area. Begin by lying on your side with your affected leg on top, keeping your body in a straight line from head to foot. Slowly raise your top leg towards the ceiling, maintaining control throughout the movement.
Focus on engaging the adductor muscles to initiate the lift, avoiding rotation of your hip. Lower the leg back down with the same controlled motion. Start with a limited range of motion and gradually increase it as your strength improves. Adding ankle weights can increase the challenge, but only when you can perform the exercise with proper form.
Perform several sets of repetitions, ensuring you feel a gentle contraction in the adductors without experiencing pain. This exercise builds foundational strength and prepares the adductors for more advanced movements.
Copenhagen Plank Variations
Copenhagen planks are a highly effective, yet challenging, exercise for strengthening the adductors and improving hip stability. Begin by positioning yourself with your upper body supported on your forearms, and your lower leg supported on a bench or stable surface. The unaffected leg extends out, creating a horizontal position.
Maintain a straight line from your shoulders to your knees, actively engaging your core and adductor muscles to prevent hip sagging. Slowly lower your body towards the floor, controlling the descent with your adductors. Focus on preventing hip adduction (dropping of the hip on the unsupported side).
Variations include holding the plank for increasing durations or performing controlled hip dips. This exercise significantly enhances eccentric adductor strength, crucial for preventing re-injury. Progress gradually, prioritizing proper form to avoid compensatory movements and maximize effectiveness.
Phase 4: Advanced Rehabilitation & Return to Sport (Weeks 6+)
Progressive agility drills and sport-specific training are key. Monitor closely for re-injury signs, emphasizing preventative strategies to ensure a safe return to activity.
Progressive Agility Drills
Initiate agility drills cautiously, focusing on controlled movements and gradually increasing intensity. Begin with simple exercises like lateral shuffling, emphasizing maintaining a stable core and proper form. Progress to cone drills, incorporating changes in direction and speed. These drills should mimic the demands of the athlete’s sport, but at a reduced intensity initially.
Introduce figure-eight runs, focusing on quick cuts and controlled deceleration. Shuttle runs are also beneficial, improving acceleration and agility. Throughout these drills, prioritize quality of movement over speed. Monitor for any signs of pain or discomfort, and adjust the drills accordingly. Ensure adequate warm-up and cool-down periods are included with each session.
Gradually increase the complexity of the drills, adding obstacles or incorporating sport-specific movements. The goal is to challenge the athlete’s agility and coordination while minimizing the risk of re-injury. Remember, a successful return to sport requires a progressive and individualized approach.

Sport-Specific Training
Transitioning to sport-specific training is crucial for a successful return. This phase involves replicating the movements and demands of the athlete’s particular sport, gradually increasing the intensity and volume. Begin with modified drills, focusing on technique and control before progressing to full-speed activities.
For example, a soccer player might start with passing drills, then progress to shooting and dribbling. A runner could begin with short sprints, gradually increasing distance and speed. Ensure the athlete can perform these activities without pain or compensatory movements. This phase requires close monitoring and individualized adjustments.
Incorporate drills that challenge the adductor muscles in a sport-specific manner, such as cutting, pivoting, and explosive movements. Prioritize proper biomechanics and technique to minimize the risk of re-injury. Remember, a gradual and progressive approach is key to a safe and effective return to sport.
Monitoring for Re-Injury & Prevention
Vigilant monitoring is paramount throughout the late stages of rehabilitation and upon return to sport. Athletes should be closely observed for any signs of pain, discomfort, or altered movement patterns. Regular assessments of adductor strength, flexibility, and functional performance are essential.
Proactive prevention strategies are vital to minimize the risk of re-injury. These include continued adherence to a comprehensive warm-up routine, incorporating dynamic stretching and activation exercises for the adductor muscles. Maintaining optimal hip and core strength is also crucial for stability and control.
Educate the athlete on proper biomechanics and technique during sport-specific activities. Address any underlying factors that may contribute to groin strain, such as muscle imbalances or inadequate conditioning. Long-term success relies on a commitment to ongoing maintenance and preventative care.