
AeroGarden Instruction Manual: A Comprehensive Guide
Welcome! This manual details AeroGarden setup, operation, and maintenance, covering models like the Classic 7 and 6 LED. Access manuals and support online at AeroGarden.com.
Understanding Your AeroGarden Model
AeroGarden offers diverse models, including the Classic, and LED series (like the 6 and 7). Each system utilizes hydroponics – growing plants without soil – employing water, nutrients, and light. Familiarize yourself with your specific model’s features; the Classic 7, for instance, accommodates seven plant pods, while the 6 LED offers a more compact design.
Refer to the included documentation or the AeroGarden website (AeroGarden.com) for detailed specifications regarding your unit’s dimensions, water reservoir capacity, and lighting system. Understanding these aspects is crucial for optimal plant growth and successful harvests. Knowing your model ensures correct setup and troubleshooting, maximizing your indoor gardening experience.
Unboxing and Initial Setup
Carefully unpack your AeroGarden, verifying all components are present. These typically include the base, grow deck, water reservoir, power adapter, and plant pods. Before proceeding, inspect for any shipping damage. Place the unit on a stable, level surface near a standard electrical outlet.
Assemble the grow deck and insert it securely into the base. Ensure the water reservoir fits snugly. Do not connect the power adapter yet. A thorough visual inspection confirms everything is correctly positioned. Refer to the included quick-start guide for model-specific assembly instructions. Proper initial setup is vital for a thriving AeroGarden.
Component Identification
Familiarize yourself with your AeroGarden’s parts. The base houses the pump and electronics. The grow deck supports the plant pods. The water reservoir holds the nutrient solution. The power adapter provides electricity. Plant pods contain pre-seeded grow media.
The lighting system, often LED, promotes photosynthesis. A control panel manages settings like light and pump timers. Some models feature a display screen for easy navigation. Understanding each component’s function is crucial for successful operation and troubleshooting. Refer to diagrams in your manual for precise locations and details.
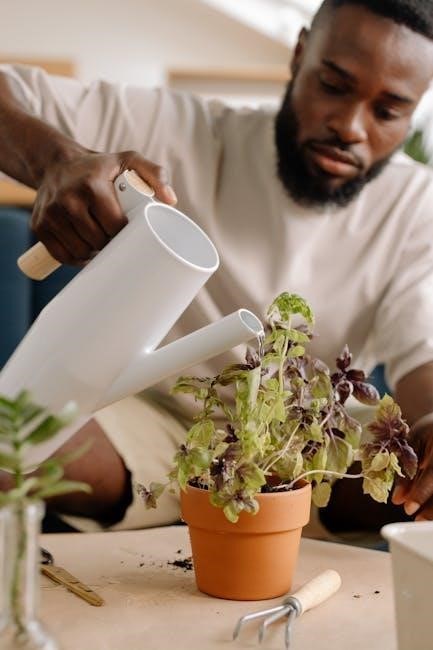
Water Quality and Reservoir Filling
Use clean, room-temperature water for optimal plant growth. Distilled or filtered water is recommended to minimize mineral buildup. Avoid using softened water, as the salt content can harm plants. Carefully fill the water reservoir to the “max fill” line indicated inside.

Do not overfill, as this can damage the pump. Regularly check the water level, especially during initial setup, as plants consume water quickly. Maintaining proper water quality and levels is essential for nutrient absorption and overall garden health. Always disconnect the power before handling the reservoir.
Setting Up the Lighting System
AeroGarden lighting systems are designed to provide the optimal spectrum for plant growth. Carefully extend the light panel to its full height, ensuring it’s securely positioned above the garden. Connect the light panel cable to the designated port on the control panel.
Avoid touching the LED lights directly, as oils from your skin can reduce their lifespan. The light height is adjustable to accommodate plants as they grow. Proper lighting is crucial for photosynthesis and healthy development. Refer to the timer settings section for controlling light cycles.
Powering On and Initial Timer Settings

Connect the AeroGarden’s power adapter to a standard electrical outlet. The control panel will illuminate upon power-up. Initially, set the timer to 15 hours of light and 9 hours of darkness – a standard setting for most herbs and vegetables.
Use the timer buttons on the control panel to adjust the light cycle. The AeroGarden automatically manages the light schedule once programmed. Observe your plants for signs of stress; adjust the timer if needed. Consistent light cycles are vital for healthy growth and predictable harvests. Refer to the section on timer functionality for advanced customization.
Understanding the Control Panel
The AeroGarden control panel features buttons for power, light, water, and timer settings. The display indicates the current settings and alerts you to low water levels or other issues. Light buttons control the intensity and duration of the grow lights. Water level indicators prompt you to add water when necessary.
Timer buttons allow you to program the light cycle, crucial for plant growth. Familiarize yourself with each button’s function for optimal control. Some models offer customizable settings for specific plant types. Refer to the manual for detailed explanations of each control panel feature.
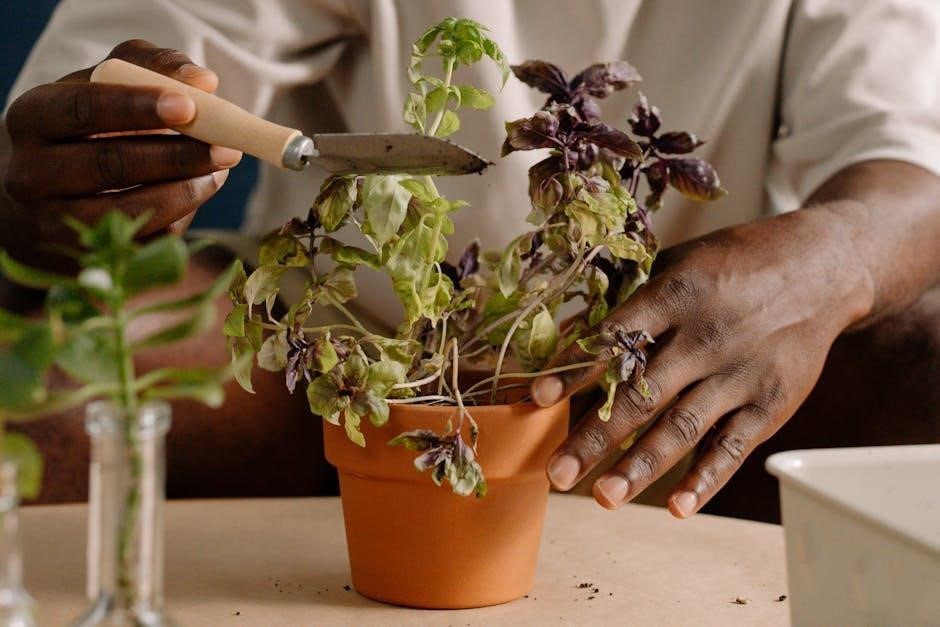
Seed Pod Installation
Begin by gently removing the plastic cover from the seed pod. Ensure the mesh basket is clean and free of debris. Carefully insert the seed pod into one of the designated openings in the AeroGarden’s growing tray. Press down firmly, but avoid compressing the seed pod excessively.
Repeat this process for all desired seed pods, spacing them evenly across the tray. Ensure each pod sits securely within its opening. The AeroGarden is designed to accommodate various pod types, including pre-seeded and empty pods for custom planting.
Nutrient Solution Management
Maintaining the correct nutrient balance is crucial for healthy plant growth within your AeroGarden. Use only AeroGarden Liquid Nutrients, specifically formulated for hydroponic systems. Avoid using traditional soil fertilizers, as they can harm the plants and the system. Regularly monitor the water level in the reservoir, ensuring it doesn’t fall below the minimum fill line.
Nutrients are absorbed with water, so consistent levels are vital. Follow the dosage charts provided with your nutrient solution for optimal results. Replace the entire nutrient solution every 1-2 weeks, or as indicated by plant health and water clarity.
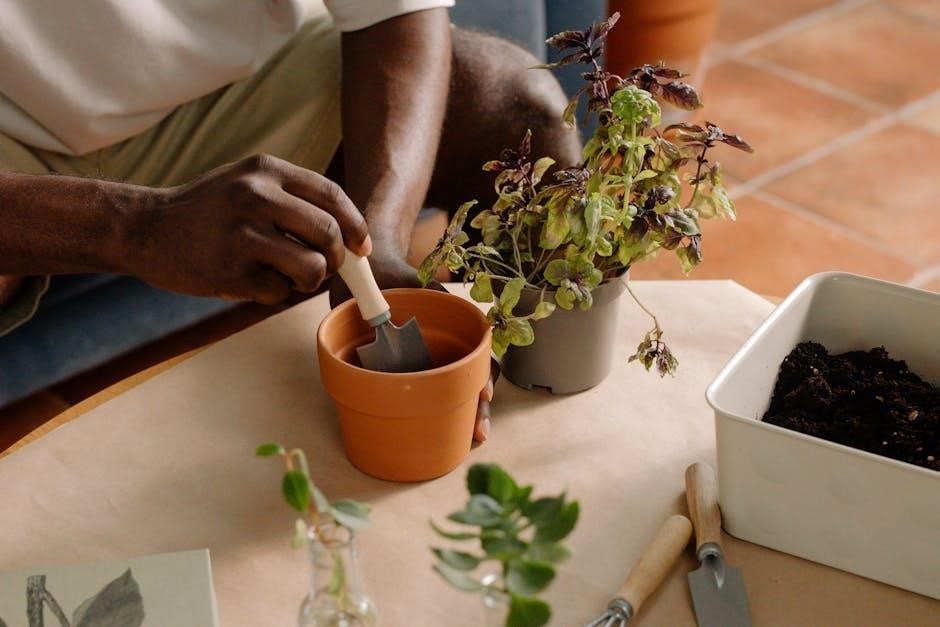
Adding Nutrients – A Step-by-Step Guide
Begin by draining the reservoir completely, discarding the old nutrient solution; Thoroughly clean the reservoir to prevent algae buildup. Refer to the Nutrient Dosage Chart for the correct amount of nutrients based on your AeroGarden model and plant stage. Typically, this involves adding ‘Grow’ nutrients for vegetative growth and ‘Bloom’ nutrients during flowering/fruiting.
Carefully measure the required amount of each nutrient solution (Part A & Part B, if applicable) using the provided measuring tools. Add Part A first, then Part B, ensuring each dissolves completely before adding the next. Top off the reservoir with water to the ‘Max Fill’ line.
Nutrient Dosage Charts

Nutrient requirements vary based on your AeroGarden model (Classic, LED, Farm) and plant type. Generally, seedlings require a diluted nutrient solution – approximately half the recommended dosage. As plants mature, gradually increase the nutrient concentration.
For vegetative growth (leafy greens, herbs), use the ‘Grow’ formula. During flowering or fruiting (tomatoes, peppers), switch to the ‘Bloom’ formula. Refer to the specific chart included with your nutrient kit for precise measurements (e.g., teaspoons per gallon). Always follow the manufacturer’s instructions to avoid over-fertilization.
Monitoring Water Levels and pH
Regularly check the water level in your AeroGarden reservoir; plants need consistent hydration. Maintain the water level between the “Min” and “Max” fill lines. Low water levels can damage the pump. Ideal pH for hydroponic growth is between 5.5 and 6.5.
Use a pH testing kit (available at garden centers) to monitor acidity. Adjust pH using pH Up or pH Down solutions, following product instructions carefully. Consistent pH ensures optimal nutrient absorption. Monitor water levels and pH weekly for best results and plant health.
Troubleshooting Common Issues
If your AeroGarden isn’t starting, check the power connection and timer settings. For pump issues, ensure the water level is sufficient and the pump isn’t clogged. Lighting problems? Verify the light panel is securely connected and the timer is functioning correctly.
Algae growth is common; address it promptly (see dedicated section). If plants aren’t growing, check nutrient levels, pH, and light exposure. Refer to the AeroGarden website (aerogarden.com) or call 1-800-476-9669 for further assistance and detailed troubleshooting guides.
Addressing Algae Growth
Algae thrives in hydroponic systems with light and nutrients. To minimize growth, ensure the reservoir is opaque to block light. Regularly clean the reservoir and plant baskets during water changes. Avoid over-fertilizing, as excess nutrients fuel algae blooms.
If algae appears, manually remove it. Consider a reservoir cover to further limit light exposure. Hydrogen peroxide (3% solution, 1 tsp per gallon) can help, but use cautiously. Consistent maintenance is key to preventing significant algae issues and maintaining a healthy AeroGarden environment.
Dealing with Pump Noise
AeroGarden pumps are generally quiet, but some noise is normal. Ensure the pump is fully submerged in water; air bubbles can cause rattling. Check for debris obstructing the pump intake, and clean it if necessary. Positioning the AeroGarden on a stable, level surface minimizes vibrations.
If noise persists, try gently adjusting the pump’s position. Minor humming is typical, but loud buzzing or grinding indicates a potential issue. Contact AeroGarden support if the pump seems faulty or excessively noisy, as it may require replacement to maintain optimal garden function.
Resolving Lighting Problems
If lights aren’t functioning, first verify the power connection and timer settings. Ensure the light panel is securely attached. Check for blown fuses or tripped circuit breakers. LED lights rarely burn out completely; dimming often indicates a power supply issue.
For flickering lights, try a different outlet. If problems continue, consult the AeroGarden website for troubleshooting guides or contact customer support. Avoid disassembling the light panel yourself, as this could void the warranty. Proper lighting is crucial for plant growth, so address issues promptly.
Harvesting Your Herbs and Vegetables
Harvesting begins when plants reach a usable size, typically 6-8 weeks after planting. For leafy greens, snip outer leaves, allowing the plant to continue growing. Herbs can be harvested similarly, encouraging bushier growth. Fruiting vegetables, like tomatoes, are ready when fully colored and slightly soft to the touch.
Regular harvesting promotes continued production. Use clean scissors or pruning shears to avoid damaging plants. Don’t remove more than one-third of the plant at a time. Enjoy your fresh, homegrown produce! Consistent harvesting maximizes your AeroGarden’s yield throughout the growing season.
Pruning and Maintenance
Regular pruning is vital for optimal growth. Remove yellowing or dead leaves promptly to prevent disease and encourage airflow. Pinch back herbs to promote bushier growth and prevent flowering, which can diminish flavor. Support taller plants with small stakes if needed.
Inspect plants frequently for pests or diseases. Address issues immediately with appropriate organic solutions. Maintain cleanliness by wiping down the AeroGarden’s exterior. Ensure the water pump remains free of debris. Consistent maintenance ensures a thriving and productive indoor garden.
Cleaning Your AeroGarden
Regular cleaning prevents algae and bacterial buildup, ensuring healthy plant growth. Unplug the unit before cleaning. Empty the reservoir and wipe it down with a mild soap and water solution. Rinse thoroughly to remove all soap residue. Clean the grow deck and plant baskets similarly.
Inspect and clean the pump, removing any debris that may obstruct water flow. Wipe down the light panel with a damp cloth – avoid getting water inside. Periodically disinfect the reservoir with a diluted bleach solution (rinse extremely well afterward!). A clean AeroGarden promotes a thriving, hygienic growing environment.
Long-Term Care and Storage

For extended periods of non-use, thoroughly clean your AeroGarden following the cleaning instructions. Remove all plant matter and discard used seed pods. Dry all components completely before storage to prevent mold or mildew. Store the unit in a cool, dry place, away from direct sunlight.

Consider storing the pump separately to prevent damage. Keep the original packaging if possible, for safe transport and protection. Regularly inspect the stored unit for any signs of deterioration. Proper storage ensures your AeroGarden remains in optimal condition for future use, maximizing its lifespan.
AeroGarden Timer Functionality
The AeroGarden timer automatically controls the lighting cycles, crucial for plant growth. Initial timer settings typically default to a 15-hour on/15-hour off cycle, suitable for many herbs and vegetables. Adjusting the timer schedule allows customization based on plant needs and growth stages.
Customizing light cycles can enhance flavor and yield. Explore different on/off durations to optimize growth. Refer to plant-specific guides for ideal lighting requirements. The control panel provides intuitive access to timer settings. Understanding timer functionality is key to successful indoor gardening with your AeroGarden.
Adjusting the Timer Schedule
To adjust the timer schedule on your AeroGarden, access the control panel. Navigate to the timer settings using the buttons – typically labeled “Light” or “Timer”. Modify the ‘on’ and ‘off’ durations to suit your plants’ needs. Remember, different plants thrive under varying light cycles.
Consider the growth stage; seedlings require more light than mature plants. Experiment with schedules to find what works best. Save your changes after making adjustments. Regularly review and refine the timer schedule for optimal results. A well-adjusted timer ensures healthy, vibrant growth within your AeroGarden system.
Customizing Light Cycles
Beyond basic timer adjustments, AeroGardens allow for customized light cycles. Explore different spectrums and intensities to cater to specific plant requirements. Vegetative growth benefits from longer ‘on’ periods, while flowering stages may need reduced light exposure.
Utilize the control panel to program unique schedules. Consider simulating sunrise and sunset for a more natural environment. Observe your plants closely for signs of stress or nutrient deficiencies. Adjust the light cycle accordingly. Experimentation is key to unlocking your AeroGarden’s full potential and achieving bountiful harvests.
Accessing Support and Manuals Online
Need assistance? AeroGarden provides extensive online resources for troubleshooting and guidance. Visit AeroGarden.com to access a comprehensive library of digital manuals, FAQs, and how-to videos. Download PDF versions for offline viewing and easy reference.

Contact their customer support team via phone (1-800-476-9669) or email for personalized help. Explore online forums and communities for shared experiences and solutions. Register your AeroGarden for exclusive content and updates; Utilize the Manual Library for a wealth of information, ensuring a successful indoor gardening journey.