DIY Horizontal Murphy Bed Plans: A Comprehensive Guide
Embark on a space-saving journey! Discover detailed DIY plans for building a horizontal Murphy bed, potentially saving around $150. Access free PDF resources and step-by-step instructions, transforming any room with clever, concealed functionality.
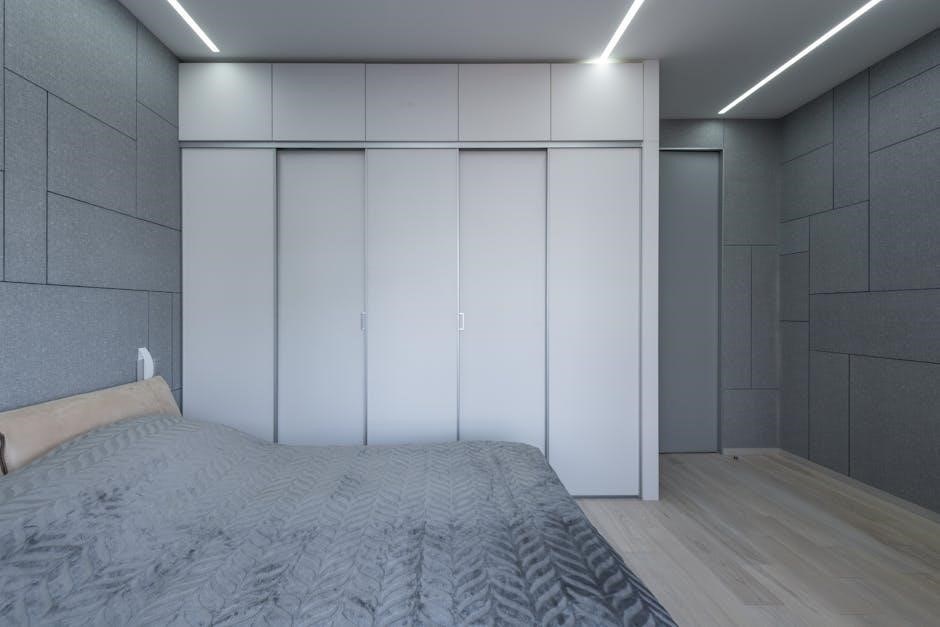
Horizontal Murphy beds, also known as fold-down beds, represent a brilliant solution for maximizing space in smaller homes, apartments, or multi-functional rooms. Unlike their vertical counterparts, these beds fold out horizontally, typically against a wall, making them ideal for rooms with lower ceilings or limited vertical clearance. The core principle revolves around a cleverly designed mechanism that allows the bed to be neatly tucked away when not in use, freeing up valuable floor space for other activities.
The appeal of a DIY approach lies in the significant cost savings – projects can be completed for around $150, avoiding the expense of pre-fabricated units. Numerous PDF plans are available online, offering varying levels of complexity to suit different skill sets. These plans typically detail the construction of a robust bed box, incorporating essential support structures and a secure mounting system. Successfully building one requires careful planning, accurate measurements, and a commitment to safety throughout the construction process; The result is a functional and stylish piece of furniture that seamlessly blends into your living space.
Cost Analysis & Budgeting (Around $150)
Embarking on a DIY horizontal Murphy bed project can be remarkably affordable, with a total cost estimated around $150. This budget breaks down primarily into materials: plywood (approximately $60-$80, depending on thickness and grade), lumber for framing and supports ($30-$40), and hardware like screws, bolts, and potentially hinges ($20-$30). Crucially, this estimate excludes the Murphy bed mechanism itself, which can range from $80 to $200+ depending on quality and features.
Free PDF plans often assume you have basic tools already. Factor in rental costs if you need to borrow or rent specialized equipment. Savings can be achieved by sourcing reclaimed wood or utilizing existing materials. Prioritize the mechanism; a reliable one ensures safety and smooth operation. Careful budgeting and comparison shopping are key. Remember to allocate a small contingency fund (around 10%) for unexpected expenses. Detailed plans will often include a materials list, aiding accurate cost projection.
Essential Tools and Materials
Successfully constructing a DIY horizontal Murphy bed demands a specific toolkit. Essential power tools include a circular saw (for sheet goods), a drill/driver (for assembly), and a sander (for finishing). Hand tools like a measuring tape, square, level, and various screwdrivers are equally vital. Safety gear – safety glasses, dust mask, and hearing protection – is non-negotiable.
Materials encompass plywood (¾” is recommended for strength), lumber for the frame (2x4s are common), and hardware (screws, bolts, hinges). The Murphy bed mechanism is a core component, requiring careful selection based on bed size and weight capacity. PDF plans will detail specific material dimensions. Consider wood glue for stronger joints. Finishing supplies – paint, stain, or sealant – complete the project. Having all materials pre-cut according to your chosen plans streamlines the build process and minimizes errors.

Step 1: Building the Bed Box – Foundation
The bed box forms the structural heart of your horizontal Murphy bed. Begin by cutting the plywood pieces according to your PDF plans – typically a base, two sides, and a top. Assemble the sides to the base using wood glue and screws, ensuring square corners. Reinforce these joints with corner braces for added stability. The top piece then secures to the sides, completing the basic box structure.
Pay close attention to dimensions outlined in your plans; accuracy is crucial for smooth operation. Consider adding internal supports within the box for increased rigidity, especially for larger bed sizes. This foundation must be robust enough to support the mattress and withstand the folding/unfolding action. Pre-drilling screw holes prevents splitting the plywood. A solid, well-built box is paramount for a safe and functional Murphy bed;
Step 2: Constructing Back Supports

Back supports are vital for safely containing the bed platform when folded. Refer to your PDF plans for precise measurements and angles. Typically, these supports consist of vertical pieces attached to the rear of the bed box, extending upwards to meet the wall. Use sturdy plywood or solid wood for these components, ensuring they can bear the weight of the bed and mattress.

Securely attach the supports to the bed box using screws and wood glue. Reinforce the connection with metal brackets for enhanced stability. These supports will also serve as mounting points for the Murphy bed mechanism. Precise alignment is critical; any misalignment can hinder smooth operation. Double-check all measurements before cutting and assembling. Consider adding a horizontal brace between the vertical supports for increased rigidity and weight distribution.
Step 3: Creating Front Supports
Front supports are crucial for guiding the bed platform during folding and unfolding. Your PDF plans will detail the specific design, often involving angled pieces that connect the front of the bed box to the Murphy bed mechanism. These supports must be robust enough to withstand the force exerted during operation and prevent the bed from collapsing.
Construct these supports from high-quality plywood or solid wood, ensuring precise cuts and secure joinery. Use screws, wood glue, and potentially metal reinforcements for maximum strength. Pay close attention to the angles specified in the plans, as these directly impact the bed’s functionality. The front supports will also house the locking mechanism, so ensure adequate space and proper alignment. Test the supports’ stability before proceeding to the next step, verifying they can handle the anticipated load.
Step 4: Adding Trim – Sides and Front
Trim enhances both the aesthetics and structural integrity of your DIY horizontal Murphy bed. Refer to your PDF plans for specific trim dimensions and styles – options range from simple, modern strips to more ornate, decorative molding. Applying trim to the sides and front conceals raw edges, creating a polished, finished look.
Carefully measure and cut the trim pieces, ensuring a snug fit against the bed box. Use wood glue and finishing nails or screws to secure the trim in place. Consider using a nail gun for faster and more consistent results. Sand any imperfections and fill nail holes with wood filler before painting or staining. The trim also reinforces the front supports and sides, adding extra stability to the overall structure. A well-executed trim job elevates the bed’s appearance and contributes to its long-term durability.
Choosing the Right Murphy Bed Mechanism
Selecting the correct mechanism is paramount for a safe and functional DIY horizontal Murphy bed. Your PDF plans will likely recommend a specific type, but understanding the options is crucial. Mechanisms vary in weight capacity, ease of operation, and price point. Prioritize quality and reliability, as this component directly impacts the bed’s safety and longevity.

Horizontal mechanisms are designed for beds that fold outwards, parallel to the floor. Ensure the chosen mechanism is rated to handle the combined weight of the mattress, bedding, and anyone using the bed. Look for features like adjustable tension and locking mechanisms for added security. Consider the installation process – some mechanisms are easier to install than others. Thoroughly review the manufacturer’s instructions and safety guidelines before proceeding. A properly chosen and installed mechanism guarantees smooth operation and peace of mind.
Understanding Horizontal vs. Vertical Mechanisms
Deciphering the differences between horizontal and vertical Murphy bed mechanisms is vital when utilizing DIY plans, often found as PDF downloads. Horizontal mechanisms, as the name suggests, allow the bed to fold out from the wall horizontally, requiring more floor space when deployed but often simpler construction. They’re ideal for rooms with lower ceilings.
Vertical mechanisms, conversely, fold the bed upwards into a cabinet, saving floor space but demanding higher ceilings and a more robust cabinet structure. Your chosen PDF plans will dictate which mechanism is suitable, but consider your room’s dimensions and structural capabilities. Vertical mechanisms generally require more precise alignment and stronger support systems. Horizontal mechanisms often offer easier DIY installation. Carefully assess your space and skill level before committing to a specific design. Understanding these distinctions ensures a successful and safe build.
Safety Considerations During Construction
Prioritizing safety is paramount when tackling DIY Murphy bed projects, especially when following PDF plans. Always wear safety glasses to protect against flying debris during cutting and drilling. Securely support all wood pieces during sawing and assembly to prevent unexpected movement and potential injury. When lifting heavier components, employ a partner to avoid strain or drops.
Wall mounting requires careful attention; locate wall studs and use appropriate hardware to ensure a secure hold. Incorrect mounting can lead to catastrophic failure. Double-check all measurements and connections before tightening screws. Be mindful of pinch points during mechanism installation and testing. Regularly inspect the bed’s operation for any signs of wear or loosening. A well-constructed and safely installed Murphy bed provides years of convenient use, but neglecting safety can have severe consequences. Always consult the PDF plans for specific safety recommendations.
Wood Selection: Plywood, MDF, and Solid Wood
Choosing the right wood is crucial for a durable and aesthetically pleasing DIY Murphy bed, guided by your PDF plans. Plywood offers excellent strength-to-weight ratio and stability, ideal for the bed box and larger panels. Consider hardwood plywood for a more refined finish. MDF (Medium-Density Fiberboard) is cost-effective and paints beautifully, suitable for trim and non-structural components, but avoid using it for weight-bearing parts.
Solid wood, while more expensive, provides superior strength and a classic look. Pine is a budget-friendly solid wood option, while oak or maple offer greater durability. The PDF plans may specify preferred wood types based on structural requirements and desired aesthetics. Remember to account for wood movement with proper joinery and finishing techniques. Combining materials – plywood for structure, MDF for trim, and solid wood accents – can balance cost and quality effectively.

Detailed Cut List & Dimensions
A precise cut list is paramount when following your DIY horizontal Murphy bed PDF plans. This list details every piece of wood needed, specifying dimensions (length, width, and thickness) for optimal material usage and accuracy. Typically, the plans will outline cuts for the bed box sides, top, bottom, back supports, front supports, and trim pieces.
Pay close attention to units (inches or millimeters) and double-check all measurements before cutting. The PDF should also indicate the quantity of each piece required. Variations exist based on bed size (twin, full, queen), so ensure you’re using the correct plan for your needs. Accurate cuts minimize gaps and ensure a smooth assembly process. Consider adding a small margin for error during cutting, especially if you’re not an experienced woodworker. A well-organized cut list saves time, reduces waste, and contributes to a professional-looking finished product.

Assembly Instructions: A Step-by-Step Approach
Your DIY horizontal Murphy bed PDF plans will guide you through assembly with a sequential, step-by-step approach. Begin by constructing the bed box foundation, ensuring square corners and secure joints using screws and wood glue. Next, attach the back supports, reinforcing the structure for stability. Follow this by installing the front supports, which will house the bed mechanism.
The PDF should clearly illustrate how to attach the Murphy bed mechanism to the bed box and front supports. Precise alignment is crucial for smooth operation. Add the side and front trim, concealing raw edges and enhancing the bed’s aesthetic appeal. Throughout the process, frequently reference the diagrams in the PDF and double-check your work. Prioritize safety by wearing appropriate protective gear and using tools correctly. A methodical approach, guided by the plans, will result in a functional and attractive Murphy bed.
Finishing Touches: Painting, Staining, and Sealing
Once assembled, your DIY horizontal Murphy bed, built from your PDF plans, requires finishing for protection and aesthetics. Begin with sanding all surfaces smooth, removing any imperfections. Choose your desired finish – paint, stain, or a combination. Paint offers vibrant color options, while stain highlights the wood grain. Apply primer before painting for better adhesion and coverage.
If staining, select a shade that complements your décor. Apply stain evenly, wiping off excess. After the stain dries, apply several coats of a durable sealant, such as polyurethane or varnish, to protect the wood from scratches and moisture. The PDF may offer specific product recommendations. Allow each coat to dry completely before applying the next. A well-finished Murphy bed will not only look beautiful but also withstand daily use for years to come, enhancing your space.
Troubleshooting Common Issues
Even with detailed DIY horizontal Murphy bed PDF plans, occasional issues may arise during or after construction. A common problem is the bed not lowering or raising smoothly. This often stems from misaligned mechanisms or insufficient lubrication – check the pivot points and apply silicone spray. Another issue could be the bed box binding against the cabinet; ensure proper clearances during assembly.

If the bed feels unstable, double-check all screw connections and wall mounting security. Refer back to your PDF plans for torque specifications. Squeaking sounds often indicate friction points; identify and address them with lubricant or adjustments. Remember that five years ago, one builder experienced a complete disaster, highlighting the importance of careful construction. Don’t hesitate to revisit the plans and seek online forums for solutions if you encounter difficulties. Patience and methodical troubleshooting are key!
Adjusting the Bed Mechanism for Smooth Operation
Achieving seamless operation of your DIY horizontal Murphy bed relies on precise adjustments to the mechanism, detailed within your PDF plans. Begin by verifying the spring tension – too tight, and the bed will be difficult to close; too loose, and it may fall open unexpectedly. Most mechanisms offer adjustable tension settings; experiment incrementally.
Next, examine the lift arms and pivot points. Ensure they move freely without binding. Lubrication with silicone spray is crucial. If the bed isn’t level when deployed, adjust the leveling feet (if equipped) or shim the cabinet base. Remember one builder’s initial disaster; proper adjustment prevents similar frustrations. Refer to the PDF for specific adjustment points and recommended settings. Smooth operation is paramount for safety and longevity, so take your time and test thoroughly after each adjustment.
Mounting the Bed to the Wall – Secure Installation
Secure wall mounting is non-negotiable for a DIY horizontal Murphy bed, detailed comprehensively in your PDF plans. Locate wall studs using a stud finder; mounting directly to studs is essential for stability. Avoid drywall anchors alone – they lack the necessary strength. The PDF will specify appropriate screw sizes and types for your wall construction.
Pre-drill pilot holes to prevent splitting the wood and ensure straight alignment. Attach the bed cabinet to the wall using lag screws, ensuring they penetrate deeply into the studs. Double-check the alignment and level before fully tightening. Consider adding safety straps as an extra precaution, particularly if children will be using the bed. A failed mounting can lead to serious injury, so prioritize a robust and secure installation, meticulously following the PDF instructions.
Horizontal and Vertical Alignment Considerations
Precise alignment is crucial for smooth operation of your DIY horizontal Murphy bed, as detailed in the PDF plans. Begin by ensuring the bed cabinet is perfectly level horizontally. Use a spirit level across the top and sides, adjusting shims as needed during installation. Vertical alignment is equally important; the cabinet must be plumb to prevent binding during folding.
The PDF plans will illustrate how to check alignment at multiple points. Pay close attention to the mechanism’s mounting points – even slight misalignments can strain the system. Regularly re-check alignment after initial assembly and after any adjustments to the mechanism. Proper alignment minimizes wear and tear, ensuring years of trouble-free use. Ignoring these considerations can lead to a bed that’s difficult to operate or, worse, unsafe.
Optimizing Space with Integrated Storage
Maximize your room’s potential by incorporating storage solutions into your DIY horizontal Murphy bed design, as detailed in the PDF plans. Cleverly designed cabinets flanking the bed offer valuable space for linens, pillows, or seasonal items. Consider shallow shelves above the folded bed to utilize often-overlooked vertical space.

The PDF plans may include options for pull-out drawers or dedicated compartments. Think about incorporating lighting within the storage areas for easy access. Prioritize functionality – ensure storage doesn’t interfere with the bed’s operation. A well-planned storage system transforms the Murphy bed from a space-saver into a complete room solution. Remember to account for weight distribution when loading storage compartments to maintain balance and ease of use.
Resources for Free PDF Plans & Further Learning
Unlock a wealth of knowledge with readily available DIY horizontal Murphy bed PDF plans online! Numerous websites and woodworking communities offer detailed guides, catering to various skill levels. Explore platforms like YouTube for visual tutorials demonstrating construction techniques and offering valuable insights.
Several creators share their personal experiences, including lessons learned from past builds – a crucial resource for avoiding common pitfalls. Websites specializing in furniture plans often feature Murphy bed designs. Remember to carefully review plans before starting, ensuring they align with your capabilities and available tools. Beyond PDFs, online forums provide a space to ask questions and connect with fellow builders. Embrace the collaborative spirit of the DIY community for a smoother, more rewarding project!